In the Security Testing using OWASP ZAP article, I will try to explain basic instructions which will help you to add an automatic step using OWASP ZAP into your Continuous Integration/Continuous Delivery Platform (CI/CDP) systems for security tests.
Bu makalenin Türkçe’si için link’e tıklayınız.
What is OWASP ZAP and What is the Purpose of This Test?
OWASP (Open Source Web Application Security Project) is an online community that produces and shares free publications, methodologies, documents, tools, and technologies in the field of application security. ZAP (Zed Attack Proxy) is one of the most important tools developed by this community. The main purpose of this tool is to do security scanning for web applications.
The purpose of the method that I will describe in this article is not to teach you how to do web security testing and its tricks, also, I will not give all the technical details of ZAP. The aim is here to show you the first steps of security scan operations automatically and leave the improvements to you.
Walkthrough and Operations to be Performed
I used Cucumber and Capybara on Ruby at web automation part for this test but no matter which tool or framework is used, you can perform this procedure with any web automation method such as Selenium, Watir, etc. You can examine the code that I wrote for this test on https://github.com/swtestacademy/zap-security/tree/swtestacademy . Now, Let’s go into details of the way that we will carry out this security test.
Step by Step Instructions
Prerequisites
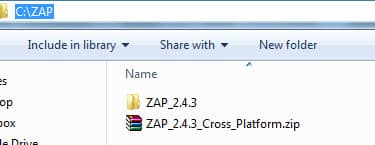
JAVA (preferably 8) must be installed on the computer/build agent/container which will perform all these operations. Download ZAP cross-platform version and extract it into the same machine. Please use the latest version when you are reading this article.

Step-1: Zap Configuration
You need to specify which address’s which port will be listened by ZAP. First, open ZAP with “zap.bat” (on Windows) or “zap.sh” (OS X or Linux), then start to modify settings. I used localhost:8095 in my project. You can do this setting on Tools -> Options -> Local Proxy screen. If you connect the internet through a proxy in your company, you can change proxy settings on Tools ->> Options ->> Connection screen. Also, you must select your Operating System and Web Browser on Tools ->> Options ->> Connection screen. These settings are shown below figures.


[Optional] Manual Security Test with ZAP and Firefox
You can change Firefox’s proxy settings as shown below. First, go to Tools ->> Options ->> Advanced tab. Then, do the following settings.


After completing these settings, restart ZAP and Firefox, and then when you visit any website you will see HTTP request lines and Alerts in the ZAP console panel as shown below. This is the MANUAL way of performing security tests.

Step-2: Browser Configuration in our Automation Code
As I mentioned earlier, I used Capybara for web automation and Selenium Webdriver as a driver. You should also install RestClient gem.
You can find how to install Ruby, Cucumber, and Capybara configuration in this article.
In this configuration, I chose Firefox as a browser. In order to reach the internet using the Firefox browser through our preferred proxy, we need to add below code in env.rb file.
Capybara.register_driver :selenium do |app|
  profile = Selenium::WebDriver::Firefox::Profile.new
  profile["network.proxy.type"] = 1
  profile["network.proxy.http"] = "localhost"
  profile["network.proxy.http_port"] = 8095
  Capybara::Selenium::Driver.new(app, :profile => profile)
end
Step-3: Start the ZAP in the Code
Before running the tests, we need to start ZAP. To do this, I executed the below line in my Ruby code.
In OS X or Linux:
IO.popen("./zap.sh -daemon")In Windows :
IO.popen("./zap.bat -daemon")In Ruby, there are a few different ways to run an external program (kernel, exec, backtik, etc.). However, after running the external program, none of the methods do automatically give the rest of the control to the ruby code.Only “IO.popen” method executes the program you want and then lets the rest of the code continue to operate.
Step-4: Running Web Automation Codes
There are passive and active ways to do security testing on web applications. You can attack the sites with AJAX crawlers inactive methods. In our sample project, we will use a passive method because the site under test doesn’t belong to us. In this method, we will automate some basic journey tests and we will let the ZAP detect security vulnerabilities in the site. If you enrich and diversify your test scenarios, you will also increase the probability of ZAP’s vulnerability detection. In our project, our journey test flow is described below;
- Navigate to www.akakce.com
- Search an item.
- Filter the results according to a certain price range.
- Go to the details of the first filtered result.
The above scenario’s code is shown below:
visit ''
page.driver.browser.manage.window.maximize
find_by_id('q').set 'lg g4'
find('button.grd2').click
find_by_id('PrList').find('div.p', match: :first)
find_by_id('pf1').set '100'
find_by_id('pf2').set '1000'
find('button.grd1').click
find_by_id('PrList').find('li.firstRow', match: :first).find('div.p').click
find('tr.first', match: :first)
sleep 20
At the end of the code, I waited 20 seconds because it takes some time for ZAP to interpret the detected vulnerabilities and send the results to the API. Instead of using static wait, you can implement this wait with status checks that the API provides. I am leaving the details of this work to you.
Step-5: Reading Warnings and Reporting with ZAP
When our tests are finished, we need to interpret the detected warnings, errors, vulnerabilities. We use ZAP API to reach them. While your ZAP instance is alive, if you go to the ZAP’s <listened proxy>/UI address with your browser, you can see all the functions that ZAP API provides us. We used the below code line to reach warnings/errors/vulnerabilities.
RestClient.get "http://#{$zap_proxy}:#{$zap_proxy_port}/json/core/view/alerts"When we get the results, then we can separate and report them with their vulnerability degrees. When we examine our code, if the high priority vulnerability is found, we print them at first and then break the build with an assertion. You can also prepare a test plan and design your build pipeline based on your criteria.
Test Codes and Test Execution
Folder Structure

GitHub Page 0f Test Codes
https://github.com/swtestacademy/zap-security/tree/swtestacademy/
Test Files
Feature File (owasp_zap_scanning.feature):
#encoding: UTF-8

Feature: Run an OWASP ZAP screening
  As a user
  I want to run a security screening for my site
  In order to have a secure application

  Scenario: Run security tests
    Given I launch owasp zap for a scan
    When I perform some journeys on my site
    Then I should be able to see security warnings
Steps File (my_steps.rb):
#encoding: UTF-8

#Launch OWASP ZAP using our launch_owasp_zap method in "functions.rb"
Given(/^I launch owasp zap for a scan$/) do
  launch_owasp_zap
end

#Run our test scenario
When(/^I perform some journeys on my site$/) do
  visit ''
  page.driver.browser.manage.window.maximize
  find_by_id('q').set 'lg g4'
  find('button.grd2').click
  find_by_id('PrList').find('div.p', match: :first)
  find_by_id('pf1').set '100'
  find_by_id('pf2').set '1000'
  find('button.grd1').click
  find_by_id('PrList').find('li.firstRow', match: :first).find('div.p').click
  find('tr.first', match: :first)
  sleep 20
end

#Get security warnings then classify and print them
Then(/^I should be able to see security warnings$/) do
  #Get response from via RestClient framework method.
  response = JSON.parse RestClient.get "http://#{$zap_proxy}:#{$zap_proxy_port}/json/core/view/alerts"

  #Classify the alerts
  events = response['alerts']
  high_risks = events.select{|x| x['risk'] == 'High'}
  high_count = high_risks.size
  medium_count = events.select{|x| x['risk'] == 'Medium'}.size
  low_count = events.select{|x| x['risk'] == 'Low'}.size
  informational_count = events.select{|x| x['risk'] == 'Informational'}.size

  #Check high alert count and print them
  if high_count > 0
    high_risks.each { |x| p x['alert'] }
  end

  #Expect high alert count equal to 0
  expect(high_count).to eq 0

  #Print alerts with risk levels
  site = Capybara.app_host
  response = JSON.parse RestClient.get "http://#{$zap_proxy}:#{$zap_proxy_port}/json/core/view/alerts",
      params: { zapapiformat: 'JSON', baseurl: site }
  response['alerts'].each { |x| p "#{x['alert']} risk level: #{x['risk']}"}
end
Functions File (functions.rb):
#encoding: UTF-8

#Launch Owasp ZAP
def launch_owasp_zap
  #Set ZAP Path
  $zap_path = 'C:\ZAP\ZAP_2.4.3'
  #Go to ZAP Path
  Dir.chdir($zap_path){
	#Determine Operating System, kill JAVA instances and Start ZAP in deamon mode.
    if determine_os == 'windows'
      system("taskkill /im java.exe /f")
      system("taskkill /im javaw.exe /f")
      IO.popen("zap.bat -daemon")
    else
      system("pkill java")
      IO.popen("./zap.sh -daemon")
    end
    sleep 5
  }
  p "Owasp Zap launch completed"
  sleep 20
end

#Operating System Determination Method
def determine_os
  if (/cygwin|mswin|mingw|bccwin|wince|emx/ =~ RUBY_PLATFORM) != nil
    return 'windows'
  elsif (/darwin/ =~ RUBY_PLATFORM) != nil
    return 'mac'
  else
    return 'linux'
  end
end
Environment File (env.rb):
#encoding: UTF-8
require 'cucumber'
require 'rspec'
require 'selenium-webdriver'
require 'rest-client'
require 'capybara'
require 'capybara/dsl'

#Define global variables
$zap_proxy = "localhost"
$zap_proxy_port = 8095

#Below lines are our driver profile settings to reach internet through a proxy
#You can set security=true as environment variable or declare it on command window
if ENV['security'] == "true"
  Capybara.register_driver :selenium do |app|
    profile = Selenium::WebDriver::Firefox::Profile.new
    profile["network.proxy.type"] = 1
    profile["network.proxy.http"] = $zap_proxy
    profile["network.proxy.http_port"] = $zap_proxy_port
    Capybara::Selenium::Driver.new(app, :profile => profile)
  end
end

#Screenshot operations
$screenshot_counter = 0
Capybara.save_and_open_page_path = File.expand_path(File.join(File.dirname(__FILE__), "../screenshots/"))

#Capybara settings
Capybara.run_server = false
Capybara.default_driver = :selenium #Use Selenium as Driver
Capybara.javascript_driver = :selenium #Use Selenium as JS Driver
Capybara.default_selector = :css #Defatult Selector methos is CSS
Capybara.default_max_wait_time = 15 #Wait time is 15 seconds
Capybara.ignore_hidden_elements = false #Do not ignore hidden elements
Capybara.exact = true #All is expressions match exactly (Exact Match/Ignores substring matches)
Capybara.app_host = 'http://www.akakce.com' #Our test site
World(Capybara::DSL)

ENV['NO_PROXY'] = ENV['no_proxy'] = '127.0.0.1'
if ENV['APP_HOST']
  Capybara.app_host = ENV['APP_HOST']
  if Capybara.app_host.chars.last != '/'
    Capybara.app_host += '/'
  end
end

FIRST_ACCOUNT_SUFFIX = 5001
$delete_enabled = true
$environment = 'qa'
Test Execution
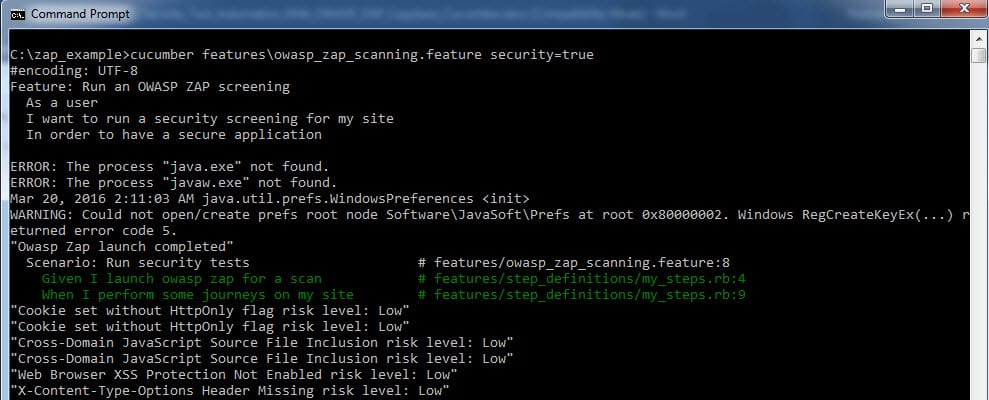
You can go to your test automation project folder and run the below command.
cucumber features\owasp_zap_scanning.feature security=true

and then ZAP will open and you will see the below results.

GitHub Project
https://github.com/swtestacademy/zap-security/tree/swtestacademy
Conclusion
Actually, the method that I tried to explain here is new even to me. There are many improvements that can be made. I hope this article, which aims to explain the security tests that can be done without external human intervention, will be useful to you. Please keep in mind that applying the techniques described here does not mean that you do not need any more security or penetration testing. Security is a very serious issue and it has to be handled by security experts from an engineering point of view. The basic objective of our test here is to give feedback to the development team about the safety of the product from the first iteration and ensure the basic level of security. Also, it can help us to find and eliminate the security vulnerabilities before the extensive and more professional security/penetration testing phases.
[fusion_tagline_box backgroundcolor=”” shadow=”no” shadowopacity=”0.7″ border=”1px” bordercolor=”” highlightposition=”top” content_alignment=”left” link=”” linktarget=”_blank” modal=”” button_size=”” button_shape=”” button_type=”” buttoncolor=”” button=”” title=”About ThoughtWorks and Test Hive” description=”” margin_top=”” margin_bottom=”” animation_type=”0″ animation_direction=”down” animation_speed=”0.1″ class=”” id=””]ThoughtWorks is a software consultancy firm which carries on its operations in 12 countries with 34 offices and more than 3600 consultants since 1993. In software sector, ThoughtWorks is not only a follower and implementer, it produces and discovers new ways with its game changer consultants. Thus, it is located in a very important place in the market. ThougtWorks has been operating for more than two years in Turkey and it has an ambitious mission to change the understanding of software in our country. In order to achieve this goal, it pioneered foundation of many communities and it is also a sponsor of Test Hive group which undertakes the same mission in software testing domain. Test Hive, regularly organizes events to help progress in software testing, shares articles and research papers, organizes trainings and provides environments to the test engineers for information sharing. www.testhive.org[/fusion_tagline_box]

Alper Mermer is graduated from Hacettepe University Computer Engineering Department. He is in software sector for more than 10 years and he has spent the last 8 years by working on software testing actively. He has experience in Finance, Telecommunications, Online Retail sectors. He is also founder and the organizer of Test Hive group. Alper is now working at ThoughtWorks Turkey Office as a Quality Enforcer.
Thanks a lot for the detailed description, it was very much helpful but i am facing below issues, can you please guide me
my execution was successful and we wanted to view results from pen testing
Then I wait for “40” seconds # features/step_definitions/XXX_Steps.rb:92
Then I should be able to see security warnings # features/step_definitions/my_steps.rb:24
uninitialized constant RestClient (NameError)
./features/step_definitions/my_steps.rb:26:in `/^I should be able to see security warnings$/’
./features/support/env.rb:100:in `call’
./features/support/env.rb:100:in `block (2 levels) in ‘
./features/support/env.rb:98:in `upto’
./features/support/env.rb:98:in `block in ‘
features/US0002.feature:24:in `Then I should be able to see security warnings’
ling Scenarios:
umber features/US0002.feature:6 # Scenario: TC2762 – Ability to view all proposed investments by fund gateway
Hi,
It seems like you don’t have the RestClient gem installed. Try doing a bundle install or install it manually by gem install rest-client
i am not able to hit https sites using the above code. even though i had given the profile[“network.proxy.share_proxy_settings”] = true
browser is still showing unable to connect and closes automatically
Same for m @ vipul
Hi both, It’s really hard for me to diagnose your problem, it can be your proxy settings, OWASP launch might have failed, etc etc
Hi Alper,
Yeah that was an issue with our proxy. now it got resolved. The issue currently i am having is with this part
response = JSON.parse RestClient.get “http://#{$zap_proxy}:#{$zap_proxy_port}/json/core/view/alerts”
I am getting an error as below
Server broke connection (RestClient::ServerBrokeConnection)
Hi Alper,
I am also facing same issue ,,,
response = JSON.parse RestClient.get “http://#{$zap_proxy}:#{$zap_proxy_port}/json/core/view/alerts”
I am getting an error as below
Server broke connection (RestClient::ServerBrokeConnection)
I’m proud of you harika olmus elinize sağlık :)
Tesekkurler.